Table of Contents
- Quick Summer Car Maintenance Checklist Before a Road Trip
- 1. Check the Cooling System
- 2. Inspect the Battery and Visible Connections
- 3. Inspect Belts, Hoses, and Engine-Bay Connections
- 4. Check Tires, Tread, and Wheel Wells
- Best Lighting for Tire and Wheel-Well Checks
- 5. Look for Oil, Coolant, and Other Fluid Leaks
- 6. Inspect the Cabin Air Filter and Interior Spaces
- Complete Your Summer Car Maintenance Checklist Before a Road Trip
- A Practical Work Light Setup for Garage Car Maintenance
- Final Thoughts
Before a long summer drive, a practical summer car maintenance checklist can help you spot visible problems before they turn into roadside delays. Start by checking the cooling system, battery, tires, fluids, belts, hoses, and other areas affected by heat and mileage.
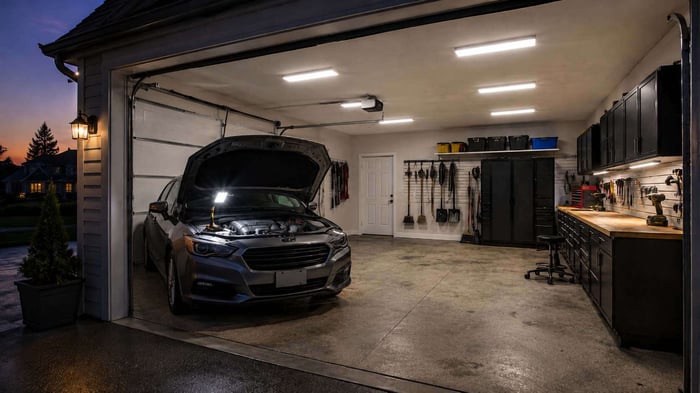
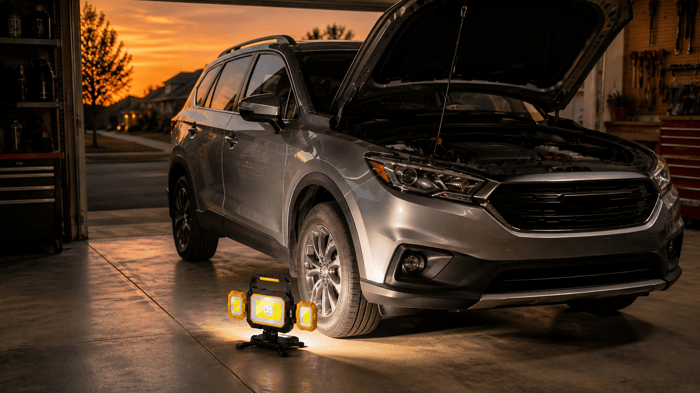
Early morning and evening are usually more comfortable times to work during summer, but natural light may be limited. An open hood, the vehicle body, and even your own position can block ceiling lights and leave important areas in shadow.
This summer car maintenance checklist covers the basic checks to complete before a road trip and explains how to use lighting effectively during early-morning or evening inspections.
Safety note: This guide covers basic visual checks only. Follow your vehicle owner's manual and leave vehicle lifting, brake repair, refrigerant service, electrical work, and unfamiliar mechanical problems to a qualified professional. |
Quick Summer Car Maintenance Checklist Before a Road Trip
The National Highway Traffic Safety Administration's summer-driving guidance recommends checking tires, coolant, fluid levels, belts and hoses, the battery, exterior lights, and other important vehicle systems before summer travel. Use this summer car maintenance checklist as a quick pre-trip vehicle inspection guide.
Garage check | What to inspect | Common lighting problem | Better lighting approach |
Cooling system | Coolant level, hoses, clamps, and visible leaks | The open hood blocks overhead light | Wide, angled engine-bay lighting |
Battery | Terminals, corrosion, case, and visible cables | Tight space and reflective metal | Compact, low-glare inspection light |
Belts and hoses | Cracks, wear, bulges, and loose connections | Parts create overlapping shadows | Broad main light plus local inspection |
Tires and wheel wells | Pressure, tread, sidewalls, and visible damage | Ceiling light cannot reach inward | Low-angle, floor-level lighting |
Fluids and leaks | Levels, wet areas, drips, and floor stains | Moisture blends into dark surfaces | Low side lighting across the surface |
Cabin air filter | Filter, clips, cover, airflow, and debris | Small area with reflective plastic | Compact floodlight or headlamp |
1. Check the Cooling System
The cooling system deserves early attention before hot-weather driving. High outside temperatures, slow traffic, long climbs, and extended air-conditioner use can place additional demand on the system.
Wait until the engine is completely cool, then look for:
- Coolant within the range specified for the vehicle
- Visible cracks, bulges, or deformation in accessible hoses
- Moisture or dried residue around clamps and connections
- Visible signs of leakage near the radiator or coolant reservoir
Never remove the radiator cap while the engine is hot. Coolant type, fill level, and service procedures vary by vehicle, so follow the owner's manual.
Best Lighting for a Cooling-System Check
Cooling hoses and surrounding engine components are often dark, and the hood can block much of the garage's overhead light. The rear of the engine bay and the undersides of hoses may remain difficult to see even when the front area looks bright.
Place a wide-beam work light along one side of the engine bay instead of shining a narrow flashlight straight in from the front. Angled light can make clamp edges, dried coolant residue, damp surfaces, and changes in hose shape easier to notice.
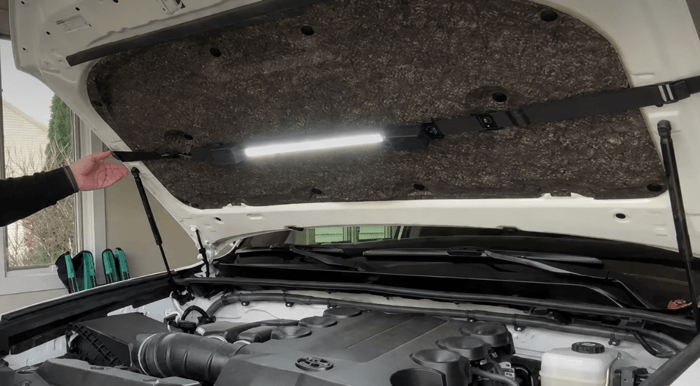
Use an underhood work light when you need broad, continuous coverage across most of the engine compartment. For a single hose, clamp, or connection, a portable light with an adjustable head is easier to aim precisely. Keep every light away from fans, belts, exhaust components, and surfaces that may still be hot.
2. Inspect the Battery and Visible Connections
Include the battery in any summer road trip car checklist, especially if the vehicle starts more slowly than usual, the battery is several years old, or the car has been sitting for an extended period.
A basic visual inspection may include:
- Corrosion or powdery buildup around the terminals
- Cracks, bulging, leakage, or visible damage to the battery case
- Wear on accessible cables or insulation
- Loose objects, moisture, or unusual residue around the battery area
Do not remove terminals or place metal tools near exposed connections unless you understand the correct procedure. A visual inspection cannot confirm battery health, so arrange a battery and charging-system test if starting is slow, lights dim unexpectedly, or the battery condition is uncertain.
Best Lighting for a Battery Check
The battery is often installed along one side of the engine bay, surrounded by covers, wiring, and a fuse box. A large light placed too close can block your view rather than improve it.
Use a compact floodlight from the side or from a slight angle above the battery. Moderate brightness is usually better than maximum output because metal terminals and light-colored labels can reflect strong light back toward your eyes.
A magnetic inspection light can keep both hands free, but attach it only to a clean, stable steel surface. Keep the light, magnet, and mounting hardware away from terminals, exposed connections, and loose cables.
3. Inspect Belts, Hoses, and Engine-Bay Connections
Heat and normal engine operation gradually affect rubber, plastic, and visible wiring. With the engine off and fully cooled, inspect only components you can identify and reach safely.
Look for:
- Cracking, glazing, or frayed edges on accessible belts
- Bulges, cuts, soft spots, or deformation in hoses
- Dampness or dried residue near clamps and connections
- Loose, pinched, or visibly damaged wiring
Do not inspect belts while the engine is running or reach into areas you cannot clearly identify. A squealing belt, repeated fluid loss, damaged wiring, or an unfamiliar condition should be evaluated by a professional.
Why One Flashlight May Miss Problems
An engine bay contains several layers of components. A flashlight aimed from the front may brighten the nearest parts while leaving the rear of a hose, the side of a fitting, or the space behind wiring in deep shadow.
A practical setup uses one main light for broad engine-bay coverage and a smaller inspection light for connectors, hose backs, and narrow spaces. A bar-style underhood light works well for continuous, hands-free coverage. The HOKOLITE CLAKAP U2 is suited to this role because it spreads light across a wider area beneath the hood. A multi-angle portable work light is more flexible when the inspection point changes repeatedly.
CLAKAP U2- 2600 Lumen Rechargeable Underhood Extendable Work Light For Car Repair & Garage

$44.99
$49.99
Full-Bay Lighting. Close-Up Flexibility. Designed for auto repairs and vehicle inspections, the HOKOLITE CLAKAP U2 stretches across the hood to illuminate the entire engine bay—then detaches for focused lighting wherever the job takes you. Light Up the Entire Engine Bay… Read More
Match the lighting approach to the task:
- Whole engine bay: broad, continuous illumination
- One hose or connection: adjustable local lighting
- Deep or narrow area: compact secondary inspection light
4. Check Tires, Tread, and Wheel Wells
Check tire pressure before a long drive and compare it with the vehicle manufacturer's recommendation. The correct pressure is usually listed on the driver-side door-jamb label or in the owner's manual, not on the tire sidewall. For the most accurate reading, follow NHTSA's tire-safety guidance and check pressure when the tires are cold.
Inspect:
- Uneven tread wear or tread worn level with the built-in wear indicators
- Cracks, cuts, bulges, exposed cords, or other sidewall damage
- Nails, stones, or objects embedded in the tread
- Debris or visible irregularities inside the wheel well
- The spare tire and inflation kit, when equipped
Have significant sidewall damage, exposed cords, repeated pressure loss, or unusual wear evaluated before the trip.
Best Lighting for Tire and Wheel-Well Checks
Ceiling lights rarely illuminate the inward-facing side of a tire or the upper wheel well. A round flashlight placed on the floor may roll away and can be difficult to keep aimed upward.
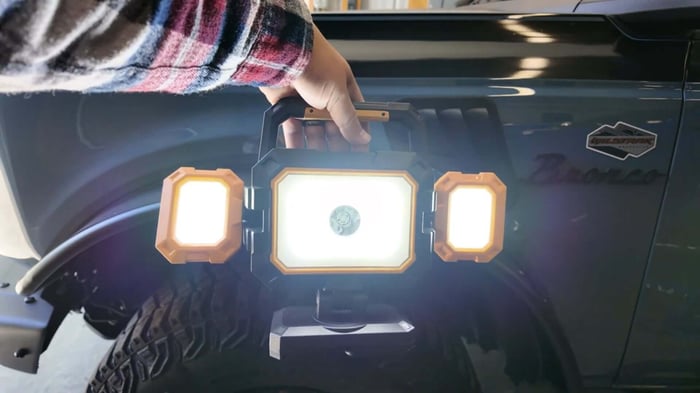
Place a folding or free-standing work light on the floor in front of the tire, then angle it upward and inward. Low-angle lighting adds contrast inside tread grooves and reveals more of the wheel well than a narrow spotlight.
The HOKOLITE YZONI W5 suits this type of garage task because its lighting direction can be adjusted without repeatedly moving the entire light. Use only enough brightness to reveal detail without creating harsh glare on the wheel or body panel.
YZONI W5 4000-8000LM Rechargeable Work Light&Power Bank for Car Repair, Garage & Emergencies

$49.99
Built for the Repairs You Do in Your Own Garage. From engine-bay checks and battery changes to wheel-area work and bench repairs, W5 gives home garage DIYers stable, multi-angle lighting without tying up either hand. 6-Magnet Hands-Free Base: Six powerful magnets secure… Read More
 5. Look for Oil, Coolant, and Other Fluid Leaks
Before leaving on a summer trip, check the garage floor where the vehicle normally parks. Then inspect safely visible reservoirs, hose connections, and engine-bay surfaces for new moisture, stains, or residue.
Look for:
- New spots, drips, or stains beneath the vehicle
- Moisture around hose connections and reservoirs
- Fresh residue on nearby engine-bay surfaces
- A noticeable change in engine oil, coolant, brake fluid, or washer-fluid level
Fluid color and location may offer clues but cannot confirm the cause. Persistent dripping, repeated fluid loss, a fuel smell, or an unknown source requires professional attention.
Use Side Lighting to Find Wet Areas
A common mistake is aiming the brightest setting directly at a dark surface. The entire area may reflect the light evenly, making a damp patch or thin fluid edge harder to distinguish.
Instead, place the work light low and to one side of the suspected area so the beam travels across the surface. Moisture, fluid edges, dried residue, and clean dry material reflect angled light differently. Move the light slowly and change the angle before increasing brightness.
For a visual check beneath the edge of the vehicle, position a slim or adjustable light from the side. Never crawl under a vehicle supported only by its emergency jack.
6. Inspect the Cabin Air Filter and Interior Spaces
The air-conditioning system works hard during summer travel. On many vehicles, the cabin air filter is located behind the glove compartment, although the position and replacement procedure vary.
Follow the owner's manual and check:
- Heavy dust, leaves, or other debris in the filter
- The correct airflow direction before reinstalling it
- The condition of the filter cover and retaining clips
- Reduced airflow or unusual odors from the vents
A dirty filter can reduce airflow, but weak cooling, unusual noises, or consistently warm air may require professional service.
Use Even Light in Tight Spaces
Behind the glove box and under the seats, the work area is small and often surrounded by light-colored plastic. A bright spotlight placed too close may create glare while leaving clips, corners, and edges dark.
A compact floodlight provides more even coverage. Place it slightly to one side rather than directly in front of your eyes. When both hands are needed, use a headlamp, clip light, or compact magnetic inspection light. In tight spaces, adjustable brightness is more useful than extreme output.
Complete Your Summer Car Maintenance Checklist Before a Road Trip
The six checks above cover the areas where task lighting makes the biggest difference, but a complete summer car maintenance checklist should also include these quick items:
- Engine oil: Check the level on level ground using the procedure in the owner's manual. Look for a sudden drop or fresh oil around the fill cap and visible engine surfaces.
- Exterior lights: Test headlights, brake lights, turn signals, hazard lights, and license-plate lights. Ask another person to help or use a nearby wall to confirm the reflections.
- Wipers and washer fluid: Check for split, skipping, or streaking blades, and fill the reservoir with the correct washer fluid.
- Safety recalls: Use NHTSA's recall lookup tool to check whether your vehicle has an open safety recall that should be repaired before the trip.
- Brake warning signs: Have warning lights, grinding, pulling, vibration, a soft pedal, or changed stopping performance inspected before departure.
- Air-conditioning performance: Confirm that airflow is steady and the cabin begins to cool. Warm air, unusual noises, or odors may require professional diagnosis.
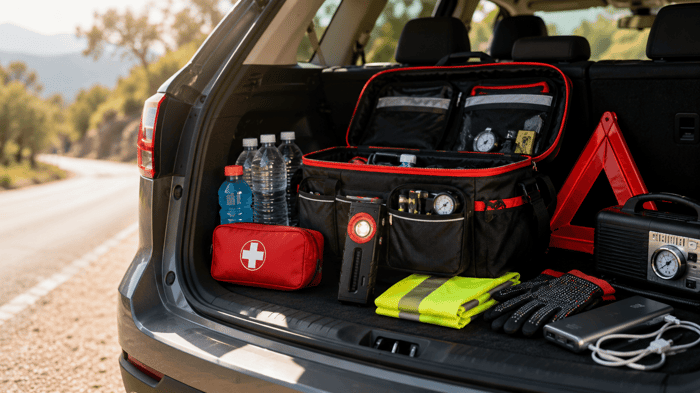
- Roadside supplies: Pack water, a first-aid kit, reflective warning gear, a tire inflator, charging cables, gloves, and a rechargeable work light.
Do not attempt brake disassembly or refrigerant service without the correct training and equipment. A portable light used in the garage can also help during a nighttime tire check or roadside inspection.
A Practical Work Light Setup for Garage Car Maintenance
One light rarely covers every task in a DIY car maintenance checklist. A useful setup combines broad coverage, adjustable local lighting, and a compact light for tight spaces.
Main Underhood Light
Best for cooling-system checks, belts and hoses, and longer hands-free tasks. Look for wide coverage, secure mounting, adjustable output, and useful runtime. The HOKOLITE 1327 is designed for broad engine-bay lighting.
Multi-Angle Work Light
Best for tires, wheel wells, leak inspections, engine-bay side lighting, and workbench tasks. An adjustable head, stable base, mounting options, several brightness levels, and a broad flood beam are useful. The HOKOLITE YZONI W5 suits jobs where the angle changes frequently.
Compact Inspection Light
Best for battery sides, cables, wiring, fuse-box areas, cabin-filter access, and narrow engine-bay spaces. A compact light does not need extreme output. Size, even illumination, secure placement, and a useful low setting matter more.
For regular garage car maintenance, one main rechargeable work light plus one compact inspection light is often more practical than relying on a single high-output flashlight.
Final Thoughts
This summer car maintenance checklist is designed to help drivers notice visible damage, low fluid levels, unusual wear, and other warning signs before a long drive—not to diagnose every mechanical problem at home.
Early-morning or evening maintenance may be more comfortable, but available light will be limited. Use a wide underhood light for cooling-system and belt checks, a multi-angle work light around tires and possible leaks, and a compact light around the battery and interior. After the garage check, a rechargeable work light can stay in the vehicle as part of a summer roadside emergency kit. Learn More Lights